 (This is just the opinion of Anisa... no offense intended)

Wednesday, December 22, 2010
Scary snowmen?
Is it just me or are these the scariest snowmen you've ever seen? I just don't think snowmen should have faces!
 (This is just the opinion of Anisa... no offense intended)
(This is just the opinion of Anisa... no offense intended)
Sunday, December 12, 2010
Christmas Cards
They are starting to come... all of those fun Christmas Cards! I love getting Christmas cards... especially from people I haven't seen in a long time! I used to throw them away at the end of the year.... gasp! But a couple of years ago, I decided to save them. It's fun to see how families change and grow over the years. And it also helps me to not forget someone on my Christmas card list.
 I didn't want to put them in a photo album... I wanted to save some space. So, I made an envelope to put them in. I used my Platin Schoolbook Cartridge on my Cricut and cut out an envelope. To make it big enough to hold all of my cards, I actually sewed two 12x12 pieces of cardstock together to make a 24"x12" piece of paper. Then I cut the envelope as big as it would go! The sewing is on the back and it adds a cute effect.
 Last year I jazzed it up a little by putting my own families photo card on the front.
 I made a tie closure on the back by using 2 eyelets and a card stock circle.
 (Up-close view)
 If you don't have a cricut, you could find an envelope template online or just purchase a manila envelope and decorate it!
-Anisa
Tuesday, December 7, 2010
Ornamental Creativity: Using What You Have
My mom is kind of old-fashioned... to say the least. But she does have some really crafty creative ideas. I thought this idea was super cute, so I wanted to share.
 She took candle sticks... and instead of putting candles in them, she put ornaments! She's going with a gold and red thing... and she loves brass, but this is a great idea. You could use any type of candle sticks that you like. I think it would be really cute as a table centerpiece.
 She took candle sticks... and instead of putting candles in them, she put ornaments! She's going with a gold and red thing... and she loves brass, but this is a great idea. You could use any type of candle sticks that you like. I think it would be really cute as a table centerpiece.
Sunday, December 5, 2010
Another use for "Glossy Accents"
So, the other day we found a baby scorpion in our bedroom.... eeeeek!!!
-Anisa
My little boys were quite fascinated with it. Brenner wanted to take it to school for show and tell. I wanted to protect this little guy while he was being passed around to 25 first graders. So, I thought back to Cami's posts on Twiddle Thumbs where she used Glossy Accents to make necklace pendants.
 (These are not my magnets... because I've never taken a picture of them... I stole this pic from this Etsy Shop.)
I have the stuff on hand from making cute magnets like these...
 (These are not my magnets... because I've never taken a picture of them... I stole this pic from this Etsy Shop.)
So, I took the little guy and put him on a piece of cardstock. Then I squeezed a generous portion of Glossy Accents over him... I wanted to cover him and protect him.
 It worked out really well. He was covered, protected and ooohed and aaaahed over by 25 first graders.

 It worked out really well. He was covered, protected and ooohed and aaaahed over by 25 first graders.
-Anisa
Monday, November 29, 2010
Seasonal Banner
I'm really into seasonal stuff... I don't know why. I think it's because I get bored with the same decorations all the time... However, I'm realizing that all of my seasonal decor takes up a lot of storage space... and it's a lot of work to change the decor every month... oh well, I still love it!!!
So, our enrichment made this countdown calendar to Christmas. I thought it was an adorable idea, but the countdown was only for 12 days and I do a countdown for all 25 days of Christmas. So I decided to use mine as a seasonal banner. I had made a few seasonal banners before. But I didn't make one for every month. Now, this cute banner is hung up all year and I will just make new cards to go into each pocket.
 (I ran out of time to embellish my Thanksgiving banner)
 Here is a close-up of the banner. You can see that what I did was sew together two pieces of plastic .... the kind you use as a table cloth... I have no idea what it's called but you can buy it at Joann. I used a zig zag stitch to sew around 3 sides. The back piece of plastic is about a 1/2 inch taller than the front piece. Mine is about 4" square, but you could make it any size. Then I just hole-punched the top corners and tied them all together with ribbons... I used browns and creams to keep it as neutral as possible.
 I think it would be really fun to make one that says "Celebrate" for birthdays. It's super easy to just take the cards out and switch them.
 And the nice thing is that all you have to store is a small stack of papers for each month!
 Let me know if you have any questions on how to make this banner.
-Anisa
Sunday, November 21, 2010
Jubilee of Trees
It's beginning to look a lot like Christmas....
When we moved to St. George I had the feeling I would get roped into helping with the Jubilee of Trees. You see, my mother-in-law, Rosalie Scholes, is the Director of Facility Decor. Which means, she is in charge of.....
 .... all decorations and set up for the Jubilee.... from Banners.....
 ... to presents in the foyer....
 .... to a giant castle that greets you as you walk in...
 ....to walls that separate all of the booths...
 .... and the details....


 ... there are a lot of details... I was feeling kind of guilty that we hadn't helped much. So, the last week before I asked, "what can we do to help." She said, "well, I'm having someone paint these banners and I just need some help outlining them in black marker." So, I headed off to a cold, empty warehouse (the staging area) to help. Little did I know.... I made the mistake of saying, "I can do that." So, I helped with the banners. I actually painted some of the banners. They hang from the ceiling to tell you know where each booth is. It was actually kind of fun and fun to walk through the Jubilee and see that I had done something to help.
 .... all decorations and set up for the Jubilee.... from Banners.....
 ... to presents in the foyer....
 .... to a giant castle that greets you as you walk in...
 ....to walls that separate all of the booths...
 .... and the details....

 ... there are a lot of details... I was feeling kind of guilty that we hadn't helped much. So, the last week before I asked, "what can we do to help." She said, "well, I'm having someone paint these banners and I just need some help outlining them in black marker." So, I headed off to a cold, empty warehouse (the staging area) to help. Little did I know.... I made the mistake of saying, "I can do that." So, I helped with the banners. I actually painted some of the banners. They hang from the ceiling to tell you know where each booth is. It was actually kind of fun and fun to walk through the Jubilee and see that I had done something to help.
  And last, but not least is my mother-in-law's tree. She has decorated a tree for 23 years. She has won people's choice many times. She is awesome at what she does! This picture doesn't do it justice!
 The Jubilee ends tomorrow (Monday, Nov. 22nd.) So, if you live in St. George and have the time... stop by and see for yourself.
 -Anisa
Saturday, November 6, 2010
Easiest Valance Ever!
Last night I whipped up a set of valances for our living room windows! They are sooo fast and easy that I thought I'd do a quick tutorial....
 1. Measure your window width. Mine was 63"
 2. Cut your fabric 2" wider to account for a 1" seam allowance on each side. I typically like my valance to drop 18". You will need to double the amount of fabric for the drop. So, basically I cut my fabric 65" wide x 36" tall.
 So, here is my fabric all cut. I drew a little diagram on the picture. Basically, you will hem the sides first, then put the fabric right sides together and sew it into a tube. Turn it right side out and iron it. You will loop the tube over your rod. Then take two pieces of ribbon. I like mine to be 15" long. So, I cut them 30" and sewed the ends together. then slip them over the rod and slide them into place. It's as simple as that!
 If you have any questions, leave a comment and I'd love to answer any questions for you.
-Anisa
(P.S. Sydney... we need to make some for your new house now!)
Wednesday, November 3, 2010
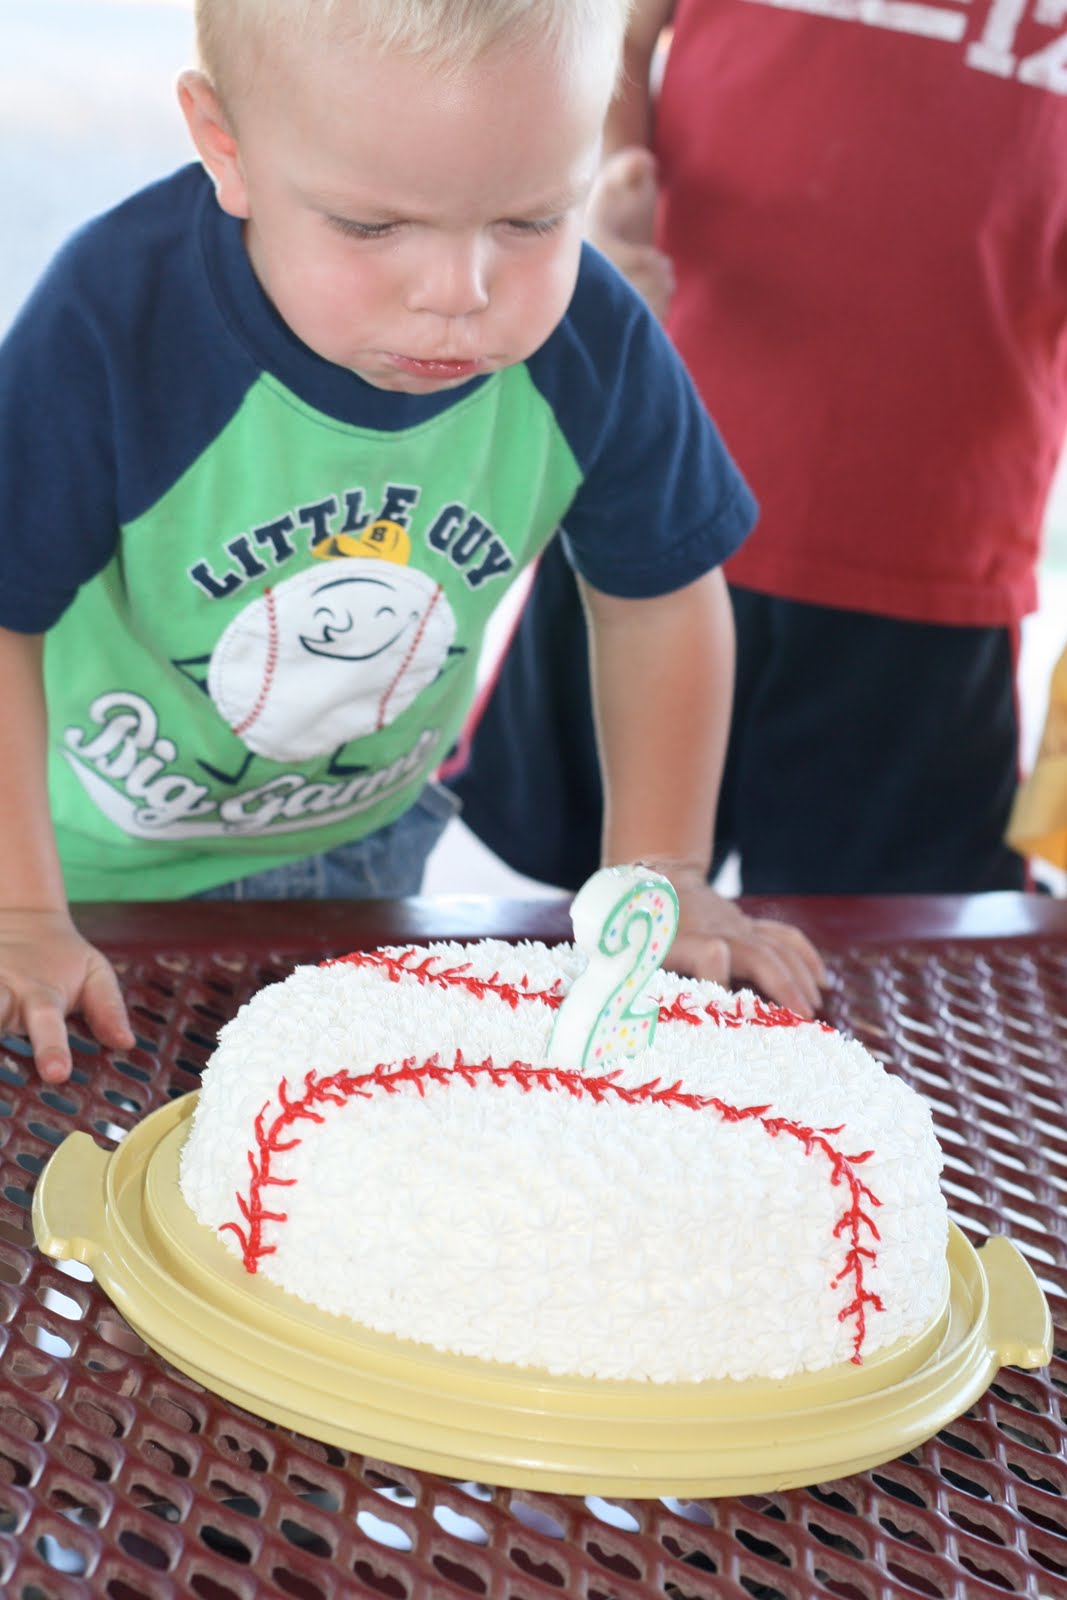
Tip Top Cake Shoppe
One of the hardest things for me about moving to St. George is not having my friend Jacinda from Tip Top Cake Shoppe to make my kids birthday cakes for me. I took classes from her so I have learned how to decorate cakes, but I'm just not that good at it... and it's not my favorite craft! Here is the craft that I made for my 2 year old.....

It's nothing compared to this cake Jacinda made for my niece....
Or this one she made for my other son....
 I have seen other people decorate cakes and they just aren't as creative as Jacinda.... I'm telling you!!!
so, if you live in the Salt Lake Valley, you can have Jacinda make an awesome creation for you. Right now she has a CONTEST going on where she will make 24 cupcakes for you... super yummy and you'd have Thanksgiving dessert taken care of! Check out the details on her blog.
-Anisa
It's nothing compared to this cake Jacinda made for my niece....

Or this one she made for my other son....
 I have seen other people decorate cakes and they just aren't as creative as Jacinda.... I'm telling you!!!
so, if you live in the Salt Lake Valley, you can have Jacinda make an awesome creation for you. Right now she has a CONTEST going on where she will make 24 cupcakes for you... super yummy and you'd have Thanksgiving dessert taken care of! Check out the details on her blog.
-Anisa
Saturday, October 16, 2010
My first try at Glazing
I love to paint furniture... and I have quite often. I usually spray paint and then sand and distress the furniture.
However, my latest project was a little different. I bought this hutch at a garage sale. I wanted to paint it red and I knew that if I distressed it, the green would show through. So, I came across this tutorial on glazing on All Things Thrifty. I painted with a brush this time because I didn't want the dusty mess of spray paint.
 So this green ( I really didn't like the color... it was a little outdated) hutch transformed into this red hutch!
 I love the red....
 Here are some close-ups of the glazing. I did a dark brown instead of black.... I was a little nervous my first time around. But I still love the way it looks!
 -Anisa
Thursday, September 16, 2010
My first craft in the new house
So, many of you know that I moved... that's why I have been posting or crafting for awhile... too busy packing and unpacking. But sometimes crafting becomes a necessity.
So, here is our computer desk that is built into our kitchen... love having the computer in the kitchen. And you'll notice the nice stack of papers on the desk. I have no where to put my kids homework, calendars, etc. I forgot to send something to preschool with my son because the calendar was buried in the bottom of the stack of papers. Stainless steel fridges are not so good for magnets. And our fridge in encased by wood so I can't even hang stuff on the side.
 So in the space below the window, I made a board to hang calendars and homework and reminders on. I simply took a piece of wood (mine was an old piece I had lying around). And I glued clothes pins to the wood. Then I mod podged a piece of scrapbook paper on the front of the clothes pins to decorate them up a little.
 So now I have a place to hang my calendars and hopefully I won't forget to send anything to preschool again.
  (Now what can I do to keep from forgetting to pick him up from preschool?)
-Anisa
Wednesday, August 18, 2010
I guess I've always been crafty
My mom has these cute little counted cross-stitch thingys hanging on a bulletin board in her guest room...

 I made them for her when I was young.... I'm guessing in my Tween years. I guess I've always liked to do crafts stuff. (funny thing is... I don't think I've ever done any counted cross-stitching since).
 -Anisa
Wednesday, August 11, 2010
Vinyl Chandelier
I purchased a rather large square frame at my local thrift store awhile back. It's about 18"x18". I bought it when I was obsessed with putting vinyl on frames.... but never got around to finishing it. I even bought the Home Decor Solutions Cricut cartridge just so I could make this frame.... anyway, I am moving so I thought it would be a good opportunity to finish up a couple of projects before I move. I just put the vinyl directly on the glass and I love it that way... but it would be really cute with a fun piece of fabric mounted behind it as well!!!
 I think I saw this idea on someone else's blog, so if it was yours... please feel free to leave a comment so people know where the original idea came from!!!
Friday, July 23, 2010
Button/Embellishment Storage
I have been trying to make my scrapbooking supplies more mobile... so that I can scrapbook someplace other than in my craft room. I have always used these divided containers for my button and embellishment storage.
 But they drive me crazy!!! I stick them in my craft bag and all the buttons slide around and get mixed up. So, I put my thinking cap on and came up with a solution!!!
 I cut a piece of chipboard the size of the lid. Then I cut a piece of batting the same size. Then I cut a piece of fabric about 1" larger around all sides. I then simply hot glued it together and glued it inside the lid of the box.
 Ta da!!! It totally works!!! No more sliding around and mixing up of buttons. It is a tight squeeze to close it, but that's okay!!!
 To hide the back side of the chipboard, I cut a piece of fabric and modpodged it on the front. Then I modpodged a border of scrapbook paper around the edge and stamped acrylic paint to label what was inside. I'm sure I could have decorated and embellished the outside a little better, but oh well!!! The important thing is that it is totally functional and solves the problem of everything getting mixed up inside!!!
-Anisa
Saturday, July 10, 2010
The Dark Divine
A friend of mine... Bree Despain (she used to live 2 houses down the street from me) has published an awesome book... The Dark Divine. She has a fun Teaser Trailer of her book that you can check out!!!
I know this has nothing to do with crafting... but sometimes its nice to just sit back and read a book:)
I know this has nothing to do with crafting... but sometimes its nice to just sit back and read a book:)
Wednesday, June 30, 2010
Anisa's Craft Room
I have been waiting until I get my craft room perfectly organized exactly how I want it to post pictures of it. Well, folks, it's never going to be exactly how I want it, so I think I'll just post it any way!!! I at least cleaned it up a little:)
 This side of the room is my scrapbooking side. I don't like to sit down when I scrapbook so I wanted something counter-top height. So I purchased 4 storage cubes from my local Robert's Crafts. (I'm sorry but I can't remember the brand of the storage cubes). You can buy them in several combinations. I wanted drawers on the bottom and the top to have cupboard doors... but I haven't ever gotten around to buying the doors. I bought a piece of wood for the top at Lowe's and painted it white. The paper stacker underneath was a yard sale purchase. I bought a bar stool without a back at a thrift store and painted it. That way I can push it out of the way most of the time. I have curtain rods hanging above the desk that I can use to display fun crafts or albums. My buttons are organized with a spice rack from Ikea. I got buckets from the dollar section of Target to hold my ribbon scraps.
 This side of the room is mostly my sewing station. My pink cabinet holds my Cricut and supplies.
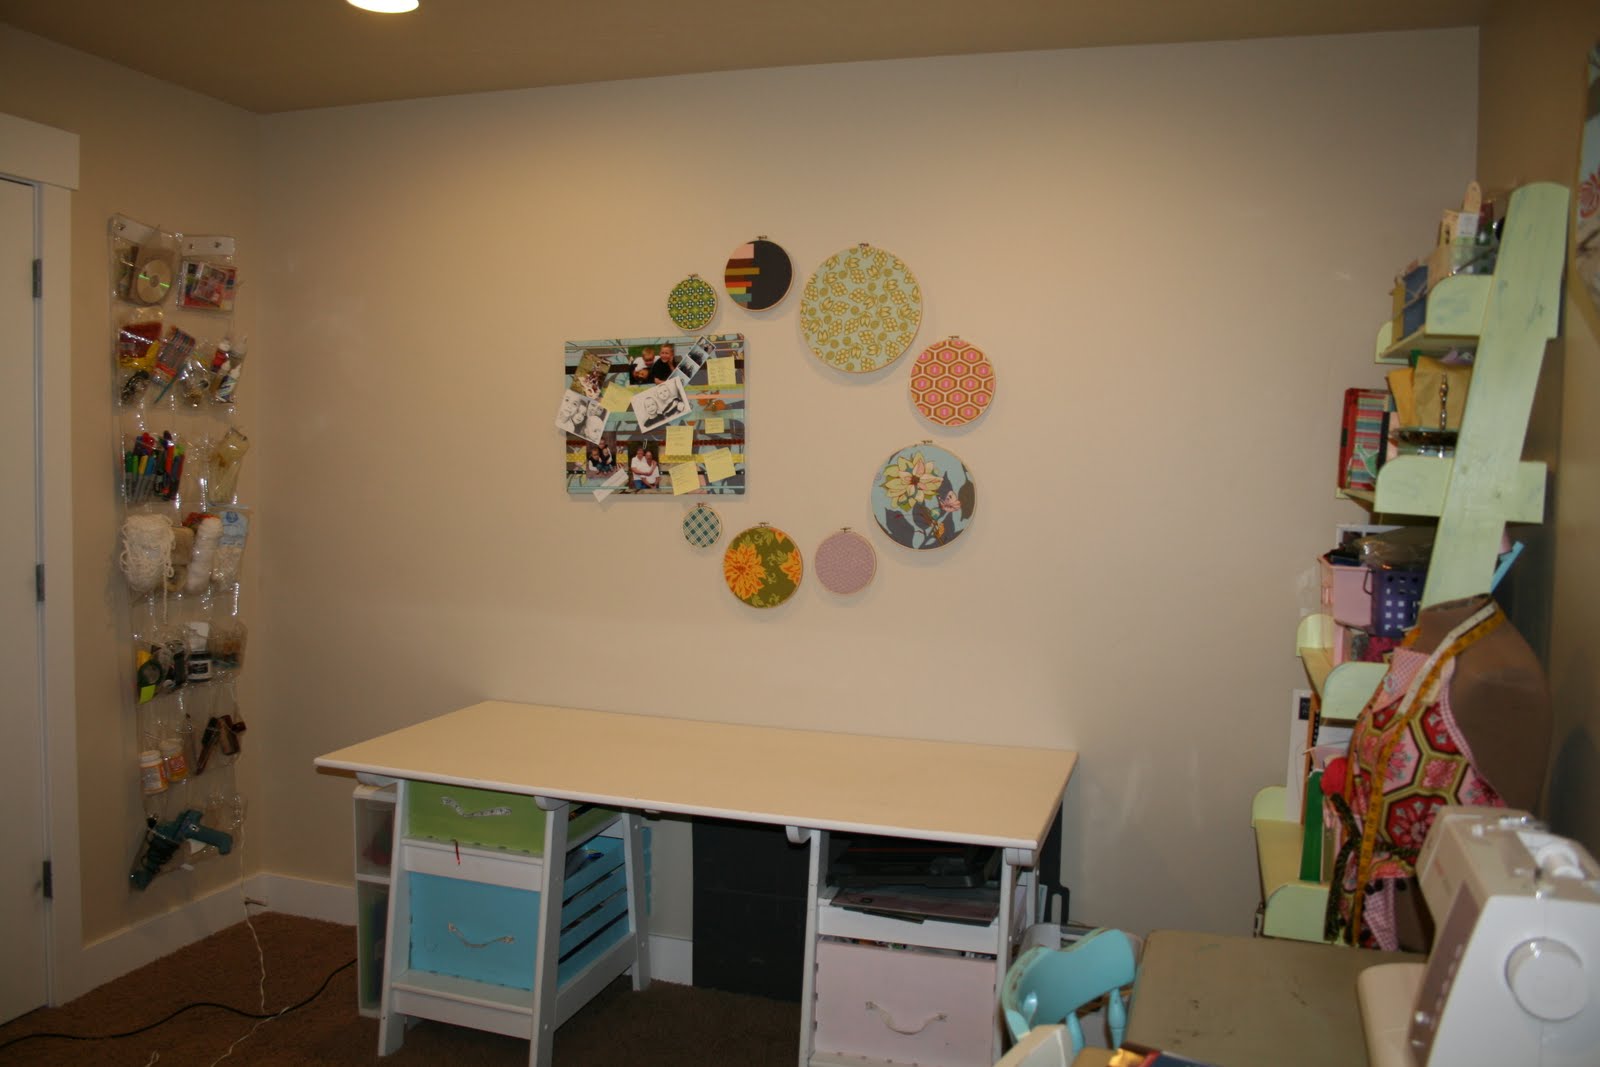 This side of the room I like to have mostly open. That way I have a place to work when I'm cutting out fabric or when I have a friend over to scrapbook. On the left you will notice a shoe hanger on the wall. You can purchase these for about $5 at Target or Walmart. I have these things all over my house... usually on the back of the door. In my pantry, it holds ziplocs bags, kool aid pouches, popcorn bags, etc.... great way to store stuff.
 This side of the room is just mostly storage. I love this fun cabinet I bought at a yard sale. I got my small ironing board at Ikea so I can iron fabric projects or bent ribbon. And the shelves on the wall are a great place to display some of my craft projects.
I love my adorable craft room.... it's my place to decorate something girly:) Do you have a craft room... or crafting space? We'd love to see it! Email us pictures at twiddlethumbs@rocketmail.com
-Anisa
Saturday, June 26, 2010
Chipboard Album
As mentioned, I am in a crafting rut right now. So, I've kind of halted all projects until something comes up. However, with the school year coming to an end, I thought I would put together a mini album for my 4 year old's first year of preschool. I had purchased this chipboard album at a garage sale for $1 and I had an 8x8 paper pad of some fun paper that I wanted to use up. My little boy was out of town for a week staying with his cousin so I thought I'd get it done for him while he was gone.


 I used the biggest Zig glue pen that they make to adhere the paper, photos and all embellishments to the album. I used Maya Mists, paint, rub-ons, etc. It turned out cute! He loves it and I'm glad he's home from his cousins. -Anisa
Subscribe to:
Posts (Atom)