For our 1 Craft-3 Ways this month we decided to do some type of bag that you could use on a vacation.
I have always wanted a HUGE swimming bag. We go swimming a lot and I need a bag big enough to hold 5 towels, 5 swimming suits, cover ups, life jackets, toys, etc..... that's a lot of stuff! So, when Angie made her
placemat purse, I thought I could kind of do the same thing with a beach towel and make a BEACH TOWEL BAG. It took a little trial and error because the first bag a made was just tooooo huge. But I think I have perfected the process.
 Look for my tutorial on how to make this awesome bag on Wednesday!! -Anisa
>><<
This little baby has been on my craft to-do list for sometime.

I knew it would be the perfect little tote for vacation for my kids (and me too).
Then I started seeing little reusable sandwich bags popping up here and there. A perfect match. A water bottle holder paired with a reusable treat bag. LOVE it. I got the tutorial for the holder
here at
Pink Chalk Studio (via
Ucreate). The treat bag is of my own design. (Hey-sometimes reinventing the wheel is much more fun than following the directions.) In order to make it day-out friendly, I attached some grommets (a.k.a. eyelets) to both the treat bag and the holder and fastened them together with a key ring (the kind that pull open). Now the kids can carry their own water AND their own snack. Brilliant!
Watch for a tutorial soon on making your own reusable treat bags!-Ang
>><<
I had no idea what I'd do for a travel bag until my friend Rachel mentioned she liked a bag that another friend had and that she'd love a similar one herself for a writer's conference attending.
Like a true crafter I blurted out: "We could make that!" and I did.

I got the original concept from
this pattern, but enlarged it somewhere in the 25-30% range. I also designed interior pockets to fit the user's purpose better. (If you'd like clearer pattern instructions that the link, email us and I'd be happy to provide them.)
The finished bag was about 18" x 13", enough to fit legal length writing pads and a larger laptop. The hidden closures were also my design (along with some other cosmetic changes). Buttons are sewn to the main body of the bag and coordinating button-hole straps are sewn on the inside of the flap.

Being only my second challenging sewing project, I'm pleased it turned out so well and as requested: serious on the outside, fun and girly on the inside!
--C

 After I met Angie, I found out that she had the same front door. That's kind of crazy, isn't it? So, here is a before picture of the headboard/door.
 I love doors... especially fun ones like these!!! I would love to find a cool old door to make into a corner bookshelf for my kitchen!!!


 And Fire Dragon with Hah (Hem's other side):

 Do you remember those ATC cards


 I had no desire to make an apron per se, but looked forward to sharpening my sewing skills (which compared to Angie's and Anisa's, need a lot of work). I asked a small group of friends if anyone wanted an apron. At least three volunteered to help by accepting one. I'm lucky that some graciously deferred and I only had to make one.
 I love notebooks. I love making lists (and crossing things off my list). A recent tune-up on my sewing machine, some lined paper I made in Word (or make some using Photoshop and
 It's been so great to have a cute place to put my daily tasks and long and short term goals. The best part was it was SO easy to make. Cut half sheets of lined paper (regular ol' computer paper) and a piece of heavier patterned scrapbooking paper. (I believe mine was 9" x 6"-or just enough to give about a 1/4" border all the way around.) Carefully sew down the middle of the book. For this part I didn't use my foot pedal. I did it all by using the turn knob on the side of my machine. (Do a test run to make sure your paper stack isn't too thick.) When it was all sewn together I decorated the front with a few simple embellishments, rounded the corners with a punch and inked the edges. It is my favorite notebook. -Ang


 -Ang
-Ang The photo on the right is the best representation of the true colors. Thanks Anisa for lending me a camera!


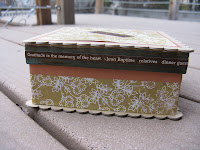
 Here is a glimpse of what the inside of the album looks like. Each person has a page with a tab on the side with their name on it. Each page has a little paper bag pocket with a card inside. On each card, we will write the year and what we are grateful for.
 Cami went with a simple approach, using semi-traditional Thanksgiving colors.
 She used