Showing posts with label Wood Craft. Show all posts

Tuesday, November 22, 2011

The Jubilee of Trees

My mother in law is one of the directors for the Jubilee of Trees. Last year I got roped into helping a little. This year I got roped into helping a little more. My sweet hubby got roped into helping EVEN more.... it is his mother after all.

My mother in law is the Director of the Facilities Decor. However, this year she was also in charge of the "Festive Furnishings" booth... which is basically a craft booth.

I suggested making some fun 2x4 crafts. So, we made 30 of these cute green trees. My job was to cut and sand all the wood.

We also made 30 of the cute snowmen... (I cut and sanded the wood)
I got to paint a few more banners....
My sweet hubby got to help build a canopy or two....
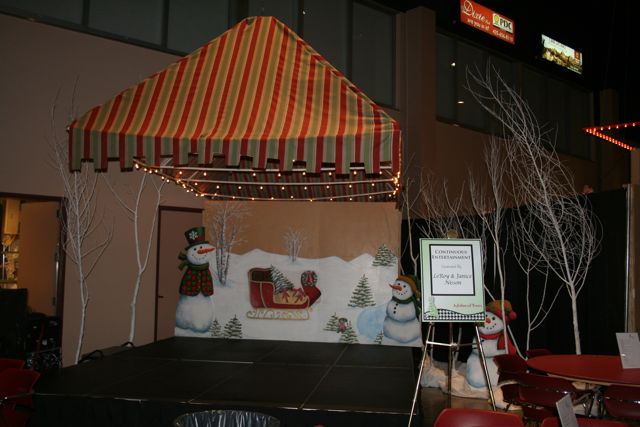
He also got to build walls....
And I must also include a picture of my mother in law's tree... of course my photography doesn't do it justice.
The whole place ends up looking AMAZING!!! But, I have to say, I'm kind of glad it's over and we can have time to focus on our own Christmas!!!

Tuesday, July 12, 2011

Still Alive and Crafting

I promise I haven't fallen off the face of the earth. I am still alive and crafting. I'm just busy having a nice summer too. And I haven't had much time to post on my craft blog. I've actually been as busy as ever crafting. I wake up early in the morning and exercise... then I scrapbook or craft until the kids wake up. I have been busily working on my two oldest boy's school scrapbooks. I also made some fun crafts for our family reunion. I will post those soon, I promise. But, for now, I thought I'd post a few simple crafts.

This one is way late, I know. It's a simple 4th of July craft made out of just 2x4's. I don't feel like it needs a tutorial because it's really quite simple. This was a craft that we made for Relief Society. I took mine home and did an little extra sanding, staining and distressing:)My two year old (almost 3) has given up his love of Elmo for Batman... he is growing up so fast. He has one pair of batman jammies that he'd wear every night... except they are often in the dirty clothes. He wears them almost all day too (if I let him). He was in desperate need of a batman t-shirt. I know I could have bought him one... and I'm sure I will for his 3rd birthday next month. But I found this old gray muscle shirt in a storage box and thought it would be a great batman shirt. It's just a simple applique. I printed the graphic off the internet. Traced it on wonder under. Then I ironed on the yellow first, then the black separately. I then stitched around each layer on the sewing machine with black thread.
Super easy, super cute and he LOVES it!!!
Can I just freeze him in time? Honestly, aside from his occasional naughtiness, he is soooo cute right now:)

-Anisa

Wednesday, June 2, 2010

Staining Tip for Wood Crafts

Seriously, staining has always been such a pain to figure out. I prefer traditional stain, but it has such a strong odor that you have to let it sit in your garage for a few days before you can bring it in the house.

I think I have finally figured out the type of stain that I prefer. And I think I have finally figured out the best techniques. So, here are some tips and tricks.

First, the kind of stain that I buy is Minwax Water-based Wood Stain in Colonial Pine. This stain is somewhat difficult to find, but I have found it at Home Depot. It should be already mixed in that color. The color is important, because anything else will be too dark or too light, etc.

Now, how you stain depends on how distressed or "dirty" you want your craft to look. If you don't want it to look too dirty, then you will want to do a couple of coats of paint and then sand it lightly... that way the stain won't adhere to the wood as well. If you want it to look dirty, then only do one coat of paint and sand away.

This stain is premixed, but I have watered it down a little bit at times to make it go further as well as make it a little lighter.

I always wear gloves when I stain because although it is water-based, it will stick to your hands and is difficult to wash off.

I prefer to stain the sides of the wood first. Then I stain the back. Wipe any excess stain off with paper towels. Then, you will want to stain the front. Wipe the stain on with a foam brush and wipe it off with paper towels. If you don't want the stain to look too dirty, wipe it off quickly.

Always let the stain dry before hot gluing anything to make sure the glue will stick.

Saturday, October 24, 2009

A little bit of decor in my master bath

So I have this fun little alcove in my master bath where the bathtub is. Kinda boring, right?

I started with this window that I had purchased for $1 at a yard sale. It was white and I spray painted it black. Kind of a little boring by itself.
I was over visiting Trey and Lucy awhile back and saw this cute idea. And what do you know.... a few weeks later, I found this wreath at a yard sale for $2! I totally knew what to do with that!

On the wall above the towel rack, I was thinking of doing some vinyl of some sort. But you know how much I love wood and all of my wood crafts.... So what I did instead, was I used my Cricut and the Storybook cartridge (which I borrowed from a friend in July and really need to return). I cut the little bird swirly thing out as big as I could do it.... 12x24. Used that as a pattern and cut it out of wood. It's fun to have a nice black silhouette but actually have some dimension to it. By the way, I will be selling these at the Seedlings boutique coming up in a couple of weeks!!! Or, you could buy one from me directly if you're interested, just send me an email at anisascholes@gmail.com

And here's the semi-final product. I'm thinking it needs a little color, so I'll probably get some ribbon to add to the wreath and what-not. Leave a comment and let me know what you think!

-Anisa

Wednesday, September 2, 2009

I'm a little obsessed with Owls!!!

Okay, so after last month's wood craft workshops at my home, I got such a huge response to owls, that I went a little crazy.... I made a cute yard stake for my little boy's silent auction at his school (sorry, I donated it before I thought to take a picture....I guess I'll have to make another one). And my sister-in-law and I made this adorable wreath! I just love it. It's already on my front door weather it's fall or not!!!

I have been having fun designing a lot of my own wood crafts. You can find some of them finished or unfinished in my Etsy shop The Craft Menagerie (link is in our side bar). I will gradually be adding finished and unfinished products to my shop. If you are local, stay tuned for my October-themed crafts which I will be doing at the end of September.

-Anisa

Wednesday, August 12, 2009

Wood Craft Workshops

We had a little bit of chilly weather last week and I couldn't believe that fall was coming yet. Well, it warmed back up, but it is still almost time for fall crafts. So, if you live in the Salt Lake Valley and want to come and craft with me, this months crafts are...


Fall Leaf Trio: Leaves-$5, Stands-$3 (I plan on having different toppers for the stands every month)
Acorn: $12
Scarecrow Yard Stake: $20 (This guy is HUGE! and so cute. He will look adorable in your yard or stuck in a bale of straw on the front porch)
Owl: $15 (can I just say how much I love owls right now! I think this guy is sooo cute. You may paint him fall colors or you could paint him whatever colors you want. I have a lot of paint colors, but if you want specific colors, just let me know. Also, you could make him hanging if you want. Just let me know and I'll round out the bottom a little more.)

Class Dates:
Tuesday, Aug. 18th 6-9 pm
Wed. Aug. 26th 6-9 pm
Thurs. Aug. 27th 6-9 pm

Price of wood craft includes wood, paint, and all the supplies that you need to complete the craft. All you need to do is show up (and bring your money:)


-Anisa (ryanisa@earthlink.net)

Friday, August 7, 2009

What time is it?

It's craft time:)

Okay, that was cheesy, but I just wanted to post this cute clock that I finally finished! (my big hold up was not wanting to pay $6 for the clock plus $3 for the hands, but I got the clock 40% off so it was just about $7 total for the clock parts)

The process.....


  • buy the cute scrapbook paper (this happened to already be this shape)
  • trace the shape onto the wood
  • cut out the wood (or pay me to cut it out for you)
  • stain the wood
  • mod podge the paper onto the wood
  • adhere stickers (I used my Cricut to cut mine out of vinyl but any stickers would work)
  • drill a hole in the center
  • insert clock (according to pkg directions)
  • hang on wall

So, I need help from our readers....

Would you buy this clock? Is it cute enough? How much would you pay for it? I am thinking about making clocks for a craft boutique or to sell on Etsy. Please leave a comment and help me out!

-Anisa


P.S. We are now on FACEBOOK and TWITTER! Click on our links on the side bar to be our follower or friend.

P.P.S. We got our pics taken today by Kristen Spencer Photography. Look for our smiling faces on our side bar soon!

Monday, July 13, 2009

Cute Wall Decor

I am soooo excited about Hijacking the blog this week!!!!!


My two older boys are off to a gymnastics camp Monday through Thursday from 9:00 am - 1:00 pm. That gives me 16 hours of crafting with just my crawling baby:)


So, I thought I'd start by finishing up a project that I started way back in May.

I went to a quilt store in St. George and saw this cute quilt that had layers of circles on it. I loved it!!! In fact it's on my list for a new bedspread in my room (my list is long). Anyway, I had some super cute fat quarters that matched the colors of my 1/2 bathroom. So I thought I'd do the same thing and then mod podge them onto wood squares.

My husband and I can't quite get up the ambition to do a lot of painting in our house so our walls are just light tan. This gave some great color to my bathroom. Here's a close up pic of one of the squares so you can see what I did.
I'm sorry I don't have a step by step tutorial with pictures, but I can kind of tell you what I did.

1. I traced out three different sizes of circles using one of my scrapbooking circle cutters.
2. I cut out squares just under the size of my wood.
3. I used Heat-n-bond to iron on the circles to each other and iron the circles onto the square.
4. I then sewed a straight stitch around the outsides of all of my fabric so it wouldn't fray too much.
5. The hard part.... I had to cut off tons of strings and any of the fraying fabric.
6. I cut out my wood.... 9" squares (or rather had the Lowe's people cut it out)
7. I stained the wood.
8. I mod podged the fabric onto the squares.
9. I had my husband hang them on the wall!!!


Wednesday, February 25, 2009

In like a Lion...

I was contemplating crafts for March and trying to think of some St. Patrick's Day crafts.  Then Cami mentioned that she was sick of clovers... "why can't we do lions and lambs or kites instead."  So, I got thinking about Angie's cute candy hearts and came up with this cute idea for a March craft.  


These were super easy to make (I'm not sure if my husband would agree) and they were fairly inexpensive.  We bought some wood at Lowe's and my husband used our jig saw to cut out the kites.  We also cut out the little stands.  Then we drilled holes in the bottom of the kites and in the stands to put the wooden dowel in.  I painted, sanded and stained the kites and then just hot glued the ribbons on the back.


Oh, and don't forget about our GIVE-AWAY!  You have until next Wednesday to leave a comment and be entered in the drawing.


- Anisa

Saturday, January 31, 2009

Clocks x3

*****Our give-away is still open! See post below*****


In January it seems like we focus a lot on time . We wonder where the previous year went. We buy new calendars. We make goals on how we're going to spend our time: more time with family, more time crafting...


With this in mind, we thought it'd be fun to all make clocks for our one craft-three ways post this month. (For another clock idea, check out this post by Anisa!)

Here they are:


Left to right, largest to smallest are Cami, Anisa, Angie.

Anisa's is a painted wood circle and the lovely paper is velvet-embossed.


Angie's is a wooden frame painted, embellished with cardstock designs cut using the Cricut and patterned paper behind the clock hands.


As for mine, I have a funny story to tell.


Crafts don't always go the way we want them to. Everything was going well with my clock. I painted a wooden circle with the paint I'd just used on my walls. The hands I'd made looked good after I'd embossed them with Ultra-Thick Embossing Enamel. I'd cut perfect circles out of scrapbook paper and thought I'd attach them with Mod-Podge. Things went horribly wrong as the cardstock started to warp and it began getting smeared, very obviously, over my careful paint job (during which I ruined a pair of jeans and almost ruined a sweater. Lesson: wear paint clothes while using paint!). I quickly removed the cardstock (my patterned paper survived), cut another circle of the same size and used a different adhesive. Unfortunately, Mod-Podge soaks into paper quickly and it had enlarged my original circle which in turn left a tacky paper-fuzz ring on the wood and it could not be removed or covered up with the original circle.

At this point it was time to go to Anisa's house so that we could get the clocks photographed together, so I thought I'd figure it out later, edit my finished clock into the photo for today's post.
I had a lot of fix-it ideas, but favored the idea of placing beads all around the cardstock to cover up the mess Mod-Podged mess. There are no brown tube beads at my local craft store so I looked around some more. I got the idea to use embossing powder to cover up the mess. I bought it and started heat embossing around my cardstock circle.
The embossing wasn't great, but I noticed another problem that my heat gun was causing. The acrylic wall paint was beginning to bubble and the Mod-Podge was turning an aged and dirty yellow color.
Right now, my clock is gross. My good-looking clock hands curled after I left the clock out in the cold garage for a few hours and the paint on the wood is beyond help. I am literally going to have to start all over and I will, right after I go buy sand paper... :(

Wednesday, January 7, 2009

Winter Wood Crafts

I love wood crafts and tole painting. I just wanted to show you some of the winter wood crafts that I have hanging around my house. These cute little guys are hanging out on my front porch.

I have a rod iron in my family room with these fun little guys hanging from it.


These little guys are on my buffet table.
Some are old and some are new, but they are all hand crafted by me!
-Anisa

Wednesday, December 10, 2008

Nativity Wreath

I have a friend that teaches craft classes in her basement. She sends out an email with a choice of 3 crafts. We sign up for the craft and the date (she offers about 5 different dates). You go to her house and she has a craft room set up in her basement. She basically has all of the supplies and the sample and you get to chat with friends and craft. I have been going to these classes with my sister in law and we make a wreath every month. This is our cute wreath for December!!!


- Anisa

Sunday, November 16, 2008

Update a Craft

Do you have any old crafts that are just a little outdated? I know I do. My mom got my started on tole painting when I was a pre-teen. I loved it and I really got into it. I made most of my stuff for my mom's house, but a few things I kept for myself. They are all really outdated, so I don't even use them. I think it's about time that I paint them and update them a little.

Angie, Cami and I had a yard sale a couple of days ago. Angie's mom gave her this turkey to sell.

I kept looking at it and wondering if there was anything I could do to fix it. Then I remembered a card I had seen in a scrapbook store. They had cut a circle for the turkeys head and body and the tail was made out of ribbon. I LOVE RIBBON. So, it finally dawned on me that I could do the same thing with this turkey. I pulled all of the rafia off. I sanded and distressed the turkey a little. Then I tied ribbon on the tail in place of the rafia. I used several different colors, patterns and styles. Some of them were just from my stash at home and I bought a few new ones because I don't have a lot of wide ribbons. Here it is... let me know what you think!!! I bet Angie wishes she hadn't gotten rid of this at her yard sale.

- Anisa

Tuesday, November 11, 2008

Any Excuse to Buy Scrapbook Paper

I love to scrapbook and I love scrapbook paper. I often find myself buying the paper just because I love it even though I don't see a layout using it in my future. Any time I can incorporate my love for scrapbook paper with my love of decorating my home, I'm on board. The added bonus is that when my project is complete, I often have left over paper scraps that I can use on a layout... I'm killing two birds with one stone (as my grandma would say).

My inspiration for this project was my son's bedding from Pottery Barn Kids. I copied the simple patterns and shapes of the truck, bus and car. I simply cut them out with scrapbook paper. I did a little bit of hand stitching with embroidery floss as well as some machine stitching. And of course the wheels needed to have buttons in the center. I love buttons. Here is the final project. I love how it turned out. A few sheets of scrapbook paper are a lot less expensive than buying art. Click on the image for a closer look.
Posted by: Anisa