Showing posts with label Holiday Crafts. Show all posts

Wednesday, December 4, 2013

ELF {on the shelf}

It's that time of year again!  

I just thought I'd post what our little elf was up to last year... to give you ideas for this year... if you need more ideas.  Most of the ideas came from various sites I have come across on Pinterest.  I'm truly sorry for not linking to you if the idea was uniquely yours... it was just too hard to keep track of where I got the ideas.
On another side note, the app that I used to create this calendar is called Photo365.  It's great for advent calendar stuff like this.  The app that I used to create the titles is called Labelbox.... love it too!

Oh, and also, I didn't want to buy the book, so I found this little plush elf on Amazon.  He's a little different than the one that everyone else has... but we like him:)

Thursday, September 12, 2013

Parade Floats are SWEET {giant candy}

Each year in our small town of Ivins, we have a parade to celebrate Pioneer Day.  Pioneer day is a religious holiday for the LDS church celebrating when the pioneers arrived in the Salt Lake Valley.   I am in the primary of our ward unit and we are always in charge of the float.  I volunteered to create our float this year (partly because I wanted it to be cute and fun, partly because I'm crazy and mostly because I also like to do a float for the 4th of July in Kanarraville.)  So, to kill to birds with one stone, I came up with an idea that would work for both parades.

For the 4th of July in Kanarraville, our float theme was "America is Sweet."
I found the ideas on Pinterest (here and here).  The ideas were originally for a candyland party.  

The first part of the float was the giant suckers made from pool noodles. To make the suckers, we took the pool noodles and glued them into a spiral using hot glue.  It took two people... one to hold and one to glue.  Them, I drilled a hole in the noodle large enough to hold a pvc pipe.  We stuck the pvc pipe in the noodle.  Then, we covered the suckers with cellophane and tied a ribbon on them.

The second part of the float was the large hard candies.  Those were easy.  We just bought the paper chinese lanterns and wrapped them with cellophane with a tie on each end.  

I ordered float fringe for the bottom of the float, but it did not arrive in time for the 4th of July... too much procrastination.  So, my cousin cut crepe paper and taped it along the bottom.

We had the kids sit on hay bales.  I covered them with some table cloths so they would not be too scratchy.  I just happened to have several table cloths that were bright and colorful and had candy and balloons on them.  It was from fabric I had purchased for $1 at a yard sale.

Here is the float for the 24th of July (Pioneer Day).  The theme was "Our Pioneer Heritage is SWEET."
For this parade, we had a lot more kids, so we needed a larger float.  I also added mesh to the sides to give it more color.  The mesh is the stuff that comes in rolls that you buy for Christmas trees... amazingly enough Hobby Lobby had Christmas stuff for sale in July.

I think it turned out cute and ended up being kind of fun... I guess.  But, I'm not volunteering next year... and our kids are just riding scooters or bikes in the Kanarraville parade:)

Thursday, December 20, 2012

Toilet Paper Tube Snowflakes {tutorial}


I am in LOVE with these snowflakes... in fact, I'm a little obsessed.  Last year I came across toilet paper tube snowflakes on Pinterest.  I thought they were awesome... so I started saving my trash... toilet paper tubes, paper towel tubes, empty wrapping paper tubes (along with my glass jars, tin canes, etc... I love to collect trash).    I had my students make some snowflakes, and my aide made some really awesome ones, then I found some time to make some... and now I can't stop making them.

So, here's a little tutorial....

1.  Gather your supplies.  Toilet paper tubes, scissors, hot glue and hot glue gun.

2.  flatten the tubes and cut them into 1/4" pieces.


 3.  Here are some of the basic shapes that I used in my snowflakes...  I created these shapes by folding the tube strips.  I also cut some of the strips for a few of the projects.
 4.  I started most of my snowflakes by taking 6 (yes, all snowflakes have 6 sides, not 4, not 5, not 8... kind of a pet peeve of mine) of the basic flattened oval shape and making my center.

5.  From there I tried to get creative.  I folded the shapes in different ways and hot glued them together.
 Some of the shapes were cut open to overlap each other.
 I kept adding to get the look I was looking for.  I found a lot of my ideas by looking on Pinterest and doing google searches.   Some of my favorite snowflakes were these snowflakes from The Crafty Sisters. I even searched for pictures of actual snowflakes and tried to copy those.
Here are some of the different snowflakes I made.
I then spray painted them turquoise and added a little glitter.  They also look awesome white or silver... and glitter is the best finishing touch!
I hung mine in my living room window.

Now, start saving your trash and have fun!  But don't get too obsessed:)

Tuesday, October 9, 2012

I've moved!

We recently moved!  It was only a few blocks away, but a move nonetheless... lots of work!  I want to post pix of the house, but I feel like I have to post in baby steps... I want to post the rooms after they are decorated... well, partially decorated.  
 I'm starting with the entry.  This is my front door... it's quite pretty.  On the right is a coat closet.  I have a vase there with fake flowers sitting on the floor.  I have plans for that corner... stay tuned.  The left side is a alcove type thing.
 I decided it would be the perfect place to put my seasonal decor... since I have a lot of it.
I have a white mirror hanging in the back.  Then, I strung a banner across the opening.  I have a different sign there for each month.  I put a wreath on the right... it can change seasonally.  I know the wreath looks weird in the pic, but it is a willow wreath layered with a fall berry wreath in front... and a big black spider on it.  The candle sticks on the left can hold candles or other objects.  In the center, I have wood blocks for each month.   Then I can put whatever fillers I have.  I love the balance of the objects and I love changing out a spot seasonally.

Saturday, July 21, 2012

4th of July Float

Sometimes I really don't know why I do these things.... why do I spend hours, days creating a float for a 5 minute parade in Kanarraville, UT?  
My cousin, Summer, and I thought it would be fun to do a float for the 4th of July.  Last year we just had the kids decorate their bikes.  This year, we wanted to win!
 Our theme was "Our Founding Fathers are the real Super Heroes."    We used the Cricut to cut out all of the lettering and stars.
 My husband built a frame out of PVC pipe and we used a vinyl table cloth from Walmart for the background.
 I didn't want to do too many dollar store decorations, but, hey, they are cheap.  I thought I'd dress up this bunting a little with tulle tied between.
 These pinwheels were really fun to make.  I got the idea from Style me Pretty.  I used 1.5 sheets of 8.5x11 card stock.  I cut them in half lengthwise and glued 3 pieces together.  Then I accordian folded them and turned them into a circle.  I hot glued the circle in the center, then glued them to wooded dowels.

 The founding fathers pics were super easy.  I used my gathering foot on my sewing machine to gather the crepe paper.  Then I just glued it to the back.   I printed the pics from Wikipedia.  I just used a big X of duct tape to attach them to the trailer and I loved the way it turned out.
 These "bottle rockets" were made from old wrapping paper rolls.  We covered them with wrapping paper.  Then we made paper cones to go on top.  We taped shiny stuff to the bottom and taped them to a wooden dowel.
The kids all dressed up like super heroes... get it???

So, they gave prizes for the best 5... in no particular order!  I say we won:)

Thursday, February 2, 2012

Pinned it and Made it!

Oh blessed....
... do you ever find yourself pinning idea after idea after idea and never doing anything with them? I often find myself doing that, but every once in awhile I really get some great ideas that I do use. I LOVED this idea from The Anderson Crew. I love the idea of being able to write "love" notes to each other. So, I dug into my mom's box of random brass candle sticks. I spray painted them with primer then with black spray paint. Then I glued my cute dollar store mail boxes on the candle sticks. I made our monograms on my Cricut with my mini monograms cartridge. To tell you the truth, I think mine are a little cuter:)
The thing that I do pin the most and actually make the most are recipes. Just thought I'd post a few that I made recently. These Rolo Cake Mix Bars from Cookies and Cups are heavenly. They really are easy except for unwrapping 40 rolos. The idea behind this brings endless possibilities. I was thinking of trying chocolate cake with Reeses Pieces or maybe chopped cashews with a Scores bar... I don't know... endless possibilities.
This Easy Cashew Chicken from Eclectic Recipes really was EASY. I thought it was good, but anything with cashews is good to me. My mom said it was nothing special... maybe that's the way to describe it... good, but nothing special.
I hope you are enjoying Pinterest as much as I am!!!

Tuesday, November 22, 2011

The Jubilee of Trees

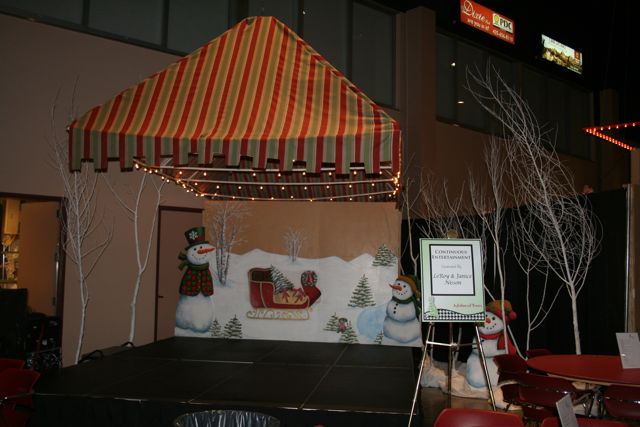
My mother in law is one of the directors for the Jubilee of Trees. Last year I got roped into helping a little. This year I got roped into helping a little more. My sweet hubby got roped into helping EVEN more.... it is his mother after all.

My mother in law is the Director of the Facilities Decor. However, this year she was also in charge of the "Festive Furnishings" booth... which is basically a craft booth.

I suggested making some fun 2x4 crafts. So, we made 30 of these cute green trees. My job was to cut and sand all the wood.

We also made 30 of the cute snowmen... (I cut and sanded the wood)
I got to paint a few more banners....
My sweet hubby got to help build a canopy or two....
He also got to build walls....
And I must also include a picture of my mother in law's tree... of course my photography doesn't do it justice.
The whole place ends up looking AMAZING!!! But, I have to say, I'm kind of glad it's over and we can have time to focus on our own Christmas!!!

Tuesday, July 12, 2011

Still Alive and Crafting

I promise I haven't fallen off the face of the earth. I am still alive and crafting. I'm just busy having a nice summer too. And I haven't had much time to post on my craft blog. I've actually been as busy as ever crafting. I wake up early in the morning and exercise... then I scrapbook or craft until the kids wake up. I have been busily working on my two oldest boy's school scrapbooks. I also made some fun crafts for our family reunion. I will post those soon, I promise. But, for now, I thought I'd post a few simple crafts.

This one is way late, I know. It's a simple 4th of July craft made out of just 2x4's. I don't feel like it needs a tutorial because it's really quite simple. This was a craft that we made for Relief Society. I took mine home and did an little extra sanding, staining and distressing:)My two year old (almost 3) has given up his love of Elmo for Batman... he is growing up so fast. He has one pair of batman jammies that he'd wear every night... except they are often in the dirty clothes. He wears them almost all day too (if I let him). He was in desperate need of a batman t-shirt. I know I could have bought him one... and I'm sure I will for his 3rd birthday next month. But I found this old gray muscle shirt in a storage box and thought it would be a great batman shirt. It's just a simple applique. I printed the graphic off the internet. Traced it on wonder under. Then I ironed on the yellow first, then the black separately. I then stitched around each layer on the sewing machine with black thread.
Super easy, super cute and he LOVES it!!!
Can I just freeze him in time? Honestly, aside from his occasional naughtiness, he is soooo cute right now:)

-Anisa

Tuesday, April 26, 2011

The Toddler Tie

My boys looked so handsome on Easter wearing these ties...
About a month ago Lil Blue Boo had a free toddler tie download. All you have to do is "like" Lil Blue Boo on facebook. (I'm not sure if you can still do this, I hope so.) So, my friend Haley and I decided to make ties for our boys. They were much easier than I expected. The pattern has step by step pictures. It's really easy to follow. However, here are a few tips:

  • The tie fits a 4-5 year old best. (I had to cut it down a little for my two year old and add a little for my 7 year old.... and it was still a little small for my 7 year old.)
  • The tie takes a fat quarter to make... not too much fabric.
  • Use light (not heavy) interfacing. (I used heavy interfacing on one of my ties and it's as stiff as a board;)
All in all, they turned out super cute.... Getting them to wear them... now that's a different story:)

Monday, April 25, 2011

My Swiss Heritage

This Easter we decided to dye eggs like our Swiss ancestors dyed eggs. My sister in law came across the idea on You Craft me Up. I'm always game to try something new... especially if its crafty.
So, the idea is that you go hunting for weeds with a red root. We asked my dad where to find such roots and he knew exactly where they were because this is how his grandma taught him to die Easter eggs (his grandma is Swiss).
So we put him to work digging up weeds for us.
Then we took them home and washed the roots. And cooked them up.

We decorated our eggs with leaves.
And cooked them in the root-dyed water.

They turned out very colorful and it was a lot of fun! For a more detailed tutorial, visit You Craft Me Up!

Wednesday, November 18, 2009

1 Craft, Three Ways: Wreaths

This is the perfect time of year for wreaths. Deck the halls and all that, right? I found this little grapevine turkey in my storage closet. My mom gave him to me a while back. We were never sure what to do with it. November we're doing wreaths and here's one that needs to be finished. Necessity is the mother of invention. I did have two issues. First, I kinda liked him the way he was. Second, I have a wreath hanger on my door that presented a bit of a challenge. In the end, I decided to go with simplicity and wrapped wired harvest-themed ribbon around each tail feather except the middle one. There I tied a fancy bow. I twisted the streamers from the bow and glued them on each "feather." When I put him on my door, it was hard to see his little poultry head. By Cami's suggestion, I stuffed him with tulle. It was a light tan and still hard to see the turkey's head. I guess I'll be heading back to the craft store to find a darker brown. For now, I'm kinda liking this little guy, though.


-Angie

Wreaths was a hard one for me... not that I don't love wreaths... I totally do. But I already have cute wood craft wreaths for every month and I just recently did a square wreath for my class. So, what else could I possibly do? Then I saw these wreaths in Pottery Barn. As always, I love to get my decorating inspiration from Pottery Barn magazines.
So, this is how I made them. I bought embroidery hoops. I took the outside hoop that screws apart and used that for one wreath. And I cut the inside one open and used it for the other wreath... then just taped it back together when I was done. I bought two books at a thrift store... It was kind of hard to rip up a perfectly good book, but, hey, you do what you've got to do for the sake of decorating. I got two books so that I could have two different sizes of pages. I cut slits in the top and bottom of each page and slipped it onto the embroidery hoop. When I was finished, I closed up the embroidery hoop and tied the ribbon to the hoop. I put these in my office.... I'm going for kind of a French county look in there and I thought the books were kind of officey... (my spell check doesn't think that's a word). I plan on leaving them up as an all the year decoration.
(truth be told, I like the PB ones a little better, but I think it's the red ribbon that I like. I have purple as an accent color in my office, so I may go on a hunt for some purple ribbon to brighten the look up a little. On a side note... I just found the most awesome website ever. I love wood crafts and I love wood, but I'd love to take it a little further. This woman has step by step instructions with diagrams and pictures and everything of how to build knock off furniture from stores like Pottery Barn and such. I can't wait to get started in a fun project... I've been wanting to make shelves for my boys' rooms.)


-Anisa


My wreath started out with a simple bleached willow wreath purchased at...the dollar store. Seriously! It was just under the size of a dinner plate.
I bought a bag of green feathers, sorted them by size and began inserting them, following their natural curve, in between the twigs, using hot glue to secure them.
I did the outer circle first, the inside portion. For the final covering of the wreath, I overlaid the feathers til the willow was covered, still using the hot glue to attach them.
I tied a few small bows with some pretty American Craft ribbon, also attaching them with hot glue.
Inexpensive and unique!
-C