Showing posts with label One Craft-Three Ways. Show all posts

Wednesday, October 14, 2009

1 Craft 3 Ways: Little Monsters

I was a little nervous doing something with monsters for October. Not that I'm scared of them. ;) I couldn't think of anything to make that had to do with monsters. Until this morning. My kids and I were hurrying home from running errands so we could play with a little friend of ours. A playdate....hmmmm....(Can you hear the wheels starting to turn?) The light bulb went on-a way to get my craft done and entertain the kids. They would do my monsters for me! Brilliant!


First I had my son and his buddy each draw me a fairly large and simple monster. This is what I got:


Next, I opened my overflowing box of felt scraps and started cutting, sewing, and adjusting as needed.


Let me introduce you to Fire Dragon and Hem:


And Fire Dragon with Hah (Hem's other side):


The boys loved them. Using the kids art work to create crafts was such a fun way to capture their little imaginations for a long time!

Ang

I was so excited to do Monsters. I just recently bought monster bedding from Target for my little boy's room. But I hadn't gotten to the decorating part yet. So, I thought I'd do a little paper piecing.... It's not like I haven't done it before!

-Anisa


I've got a couple of monster projects going on at the moment, but this is what was done in time for our post today.
Do you remember those ATC cards I mentioned a bit ago, checking for interest? Well I found an excellent site that regularly does card swaps and I joined a few of them. This is my first card for the theme of Monsters. It's a baby monster's first portait. How nice it is to kill two birds with one stone!

I might toss another one of my monster-themed crafts onto the blog later this month, but in the mean time, come up with your own! October is an awesome month to immerse yourself in creepy-crawliness.

--C

Tuesday, September 29, 2009

1 Craft-3 Ways: The Essie Doll

One day, I was just thinking about my little girl and how nice it would be to make something sweet and simple just for her. I folded a piece of printer paper in half length-wise and drew one half of a doll shape. I cut, I tweaked, I reformed and THEN I used my new pattern to cut out the form in muslin and gave a set to Anisa, Angie and myself and we each made it our own.


I made the doll, keeping open a side seam (thanks, Angie), made her dress separately and used acrylic paint for her hair and lips. I used a fine Sharpie pen for her face.

Putting her all together, I realize that there's a lot more tweaking and enlarging to do, but she's sweet anyway. Very June Cleaver-ish as opposed to the little girl look I thought I'd captured.

- Cami

I took my fabric and chopped her limbs off to make a dress form... big surprise! I made her a tiny apron and I'm using her as a pin cushion. (she looks a little weird.. I probably should have cut the skirt shape off of her too.... sometimes crafting is such a learning process).

-Anisa

What started as one idea quickly turned into another completely unexpected idea with this sweet little thing. Originally, I thought of making the doll into a little elf that would show up around Christmas and "spy" on my kids. A few sample dresses later and I realized something. This doll was not meant to be an elf. She was meant to sit on top of my Christmas Tree!

Her leggings were fused on to the muslin cutout with some wonder under. The dress is a separate piece, but hot glued around the neck. The red trim around the neck is also hot glued. I used some curly doll hair that you can get at most any crafting store for the hair. Her face is drawn on with a fine tip Sharpie, and her heart shaped mouth is painted on in a deep red. She was looking a little drab still, so I added some of my own eye shadow and blush to perk up her face a little. I love her to pieces now and can't wait to see her on top of my "mommy" tree. (Anyone want to come decorate the rest of the tree for me though?)

Ang

Wednesday, August 26, 2009

1 Craft-3 Ways: Aprons

For our 1 Craft 3 Ways this month we decided to make aprons. It was so fun to see the different patterns and fabric that we each chose.

I have a friend who is an awesome cake decorator. She teaches classes at Hobby Lobby and I told her a LONG time ago that I would make her an apron. So, I finally made her one for her birthday! I bought this cute fabric at Hobby Lobby:) I don't do well with patterns, but my mother-in-law had an apron similar to THIS pattern that you can buy at Material Girls. I just kind of looked at the pattern and made my own version. I will do a tutorial for this apron in the near future or you can purchase the pattern here. I went a little apron crazy and I have another apron in the works that is made out of a pillow case (tutorial coming soon) I also made an apron similar to this one that I am going to be GIVING AWAY soon in a CONTEST that we have coming up.... stay tuned!!!
Anisa


Aprons are the uniform of motherhood. I didn't believe that until I put one on while I was cleaning my kitchen. Guess what? I wanted to clean! But, I'm not in love with the aprons I have in my drawer already. This post was the perfect opportunity to create a new and beautiful uniform that I would love wearing. The fabric was found at a local quilting store on clearance and the pattern came from my moms stash. (Seriously, we're talking the late 70s!) When I saw the simplicity of the aprons, I knew it would be easy to update it. Instead of making the the neck strap and waist ties out of fabric, I used some inch-wide grosgrain ribbon that contrasted with my main colors. I also added the yellow gingham ruffle to the bottom for a little extra femininity. It was such a quick and easy apron and I love that it wraps completely around me. (In fact, Cami told me-ok, she dared me- I should wear it to church. Looking at this photo, I almost could!)

Angie
I had no desire to make an apron per se, but looked forward to sharpening my sewing skills (which compared to Angie's and Anisa's, need a lot of work). I asked a small group of friends if anyone wanted an apron. At least three volunteered to help by accepting one. I'm lucky that some graciously deferred and I only had to make one.

However, as soon as I started flipping through Angie's copy of A is for Apron, I found myself in love with at least three different ones and came home with the fabric store with fabric for nearly that many.

I settled on this one for starters. A simple, big pocketed design which filled Jeana's only requirement: she wanted a big bow in the back.

-C

Monday, June 22, 2009

1 Craft 3 Ways- Travel Bag!!!

For our 1 Craft-3 Ways this month we decided to do some type of bag that you could use on a vacation.


I have always wanted a HUGE swimming bag. We go swimming a lot and I need a bag big enough to hold 5 towels, 5 swimming suits, cover ups, life jackets, toys, etc..... that's a lot of stuff! So, when Angie made her placemat purse, I thought I could kind of do the same thing with a beach towel and make a BEACH TOWEL BAG. It took a little trial and error because the first bag a made was just tooooo huge. But I think I have perfected the process.


Look for my tutorial on how to make this awesome bag on Wednesday!! -Anisa

>><<

This little baby has been on my craft to-do list for sometime.
I knew it would be the perfect little tote for vacation for my kids (and me too). Then I started seeing little reusable sandwich bags popping up here and there. A perfect match. A water bottle holder paired with a reusable treat bag. LOVE it. I got the tutorial for the holder here at Pink Chalk Studio (via Ucreate). The treat bag is of my own design. (Hey-sometimes reinventing the wheel is much more fun than following the directions.) In order to make it day-out friendly, I attached some grommets (a.k.a. eyelets) to both the treat bag and the holder and fastened them together with a key ring (the kind that pull open). Now the kids can carry their own water AND their own snack. Brilliant!

Watch for a tutorial soon on making your own reusable treat bags!-Ang


>><<
I had no idea what I'd do for a travel bag until my friend Rachel mentioned she liked a bag that another friend had and that she'd love a similar one herself for a writer's conference attending.
Like a true crafter I blurted out: "We could make that!" and I did.

I got the original concept from this pattern, but enlarged it somewhere in the 25-30% range. I also designed interior pockets to fit the user's purpose better. (If you'd like clearer pattern instructions that the link, email us and I'd be happy to provide them.)

The finished bag was about 18" x 13", enough to fit legal length writing pads and a larger laptop. The hidden closures were also my design (along with some other cosmetic changes). Buttons are sewn to the main body of the bag and coordinating button-hole straps are sewn on the inside of the flap.


Being only my second challenging sewing project, I'm pleased it turned out so well and as requested: serious on the outside, fun and girly on the inside!
--C

Friday, May 22, 2009

1 Craft-3 Ways: Use a scrapbook product for a Non-scrapbook craft

In honor of our month of scrapbooking, we thought that for our 1 craft 3 ways we would use a scrapbooking product to make a non scrapbook related craft. I actually had another idea in mind, but then I was wandering around IKEA one day and I came upon this cute plant pot. I have been wanting a plant for my black and white living room, but I couldn't find a great pot. I loved the vertical lines of this pot.... and I love ribbon. So I came up with this idea. I just hot glued strips of ribbon to the pot!!! I love it! - Anisa

I love notebooks. I love making lists (and crossing things off my list). A recent tune-up on my sewing machine, some lined paper I made in Word (or make some using Photoshop and this tutorial), scrapbook paper and a few embellishments helped me make this:

It's been so great to have a cute place to put my daily tasks and long and short term goals. The best part was it was SO easy to make. Cut half sheets of lined paper (regular ol' computer paper) and a piece of heavier patterned scrapbooking paper. (I believe mine was 9" x 6"-or just enough to give about a 1/4" border all the way around.) Carefully sew down the middle of the book. For this part I didn't use my foot pedal. I did it all by using the turn knob on the side of my machine. (Do a test run to make sure your paper stack isn't too thick.) When it was all sewn together I decorated the front with a few simple embellishments, rounded the corners with a punch and inked the edges. It is my favorite notebook. -Ang


This craft is on the CHEAP!


First, I made these magnet board clippies with free promotional magnets (for animal vaccinations, of all things) and Mod-Podged squares of scrapbook paper on them that match my kids' rooms.

My kids always have so many things to hang up (little crafters, all)and they were really excited when I gave these to them.


Next, I bought some simple wooden spring clothes pins at Target for less that $2. I painted some red with acid-free acrylic paint (which I use along in my scrapbooking) and covered the others with Mod-Podge and Rusty-Pickle doodle paper.

I clip these on wires that I strung across my wall in my scrapbook/craft room and use them to hang un-finished scrapbook pages and cool products that I want to use on my next scrapbook page! --C

Wednesday, April 22, 2009

1 Craft-3 Ways: Spring Accessories

The snow has finally melted. The grass is greening up. Flowers are blooming. Winter is OVER!!Being women, what better way to celebrate spring than by adding a few new accessories to our collections?!

That's what we thought, too.

I've been having a bead craving lately, and thanks to Bead Style Magazine, I found the cutest free pattern. I did have to become a "member" to get the pattern I wanted, but that was also free. It took me a good while to do this project, but in the end it was totally worth it! I love working with beads and wire instead of just the stretchy bead cord or even fishing line. There are a few basic techniques to learn such as making a basic loop, a wrapped loop, different knots, etc. (Bead Style has a great how-to basics section in the back of every issue.) It didn't take long at all to learn them, and I've been amazed at all the fun new looks I can try now.

-Ang

I guess I couldn't keep away from the flowers either and used polymer clay to make a keychain for me to carry around. It was made from a simple cane pinched into a petal shape and then cut into small slices and layered around a shape of my own design made of scrap clay. I baked it and glued the two halves together, leaving a small side slit to get a photo of my family in there.
The photo on the right is the best representation of the true colors. Thanks Anisa for lending me a camera!

Happy Spring!   

-Cami

Okay, so I'm not an accessories person.  I don't wear jewelry... I don't even wear my wedding ring.  I toiled over ideas of what to do for this craft for a long time.  Then I saw my niece with a cute headband on when she was swimming.  I thought it would be fun to wear a headband since I always put my hair up anyway.  It would give me a little bit of style.  I found a tutorial on Chocolate on my Cranium that was super easy!

-Anisa

Saturday, March 28, 2009

One Craft-3 Ways: Decorative Pillows

Our topic for 1 craft-3 ways this month was... decorative pillow. I copied these little guys from

Pottery Barn Kids and made a little owl to match my pillow from our applique last month.


To make it, I hand drew a pattern on paper. I used my light yellow as my main fabric. Then I ironed on the other fabric pieces and did some machine applique around the pieces. It was a lot of fun and it turned out really cute!!!


-Anisa


I've been reading about print-making and thought it would be fun to incorporate a print of my favorite poet onto a pillow for the couch where I often do my reading.


This pillow was the first 'quilting' I've ever done and was probably waaaay over my skill level, but in the end I learned a lot and I'm quite pleased with the result. It measures around 18" x 18".


The print is actually an iron-on created by me using a photo of the poet which I manipulated/enhanced in Adobe Photoshop Elements and printed on ink-jet iron on transfer paper.


-C

About a month ago I found a pillow pattern by Amy Butler that I just had to make. Needless to say, I was excited our "one craft, three ways" post was pillows. When I found this basketball fabric, I knew I definitely had to make one and it had to be for my basketball-obsessed little guy. Using this pattern:


I secretly made this pillow:


I left it in his room after he had gone to bed. The next morning I woke up to, "Mommy! Thanks so much for my new beanbag!!" (Which it's not-totally a pillow, but why argue?) I will definitely be making more of these.

-Ang

P.S. Finished size is about 18 inches across and 9 inches high.

Tuesday, February 24, 2009

One Craft 3 Ways.... Applique

One of the great things about starting this craft blog is that we have deadlines. I have been wanting to make this applique pillow for almost a year to match my guest bedroom. But it just kept getting put on the back burner. Then when we decided to do applique for our "One Craft 3 Ways" I was excited that I would now have a deadline to get it done.

What I did.... First, I went fabric shopping (my favorite part). Then I cut out the fabric for my throw pillow. If you would like to see a tutorial on how to make a throw pillow similar to this one, go here. Then I traced my designs on paper. Next, I cut out my fabric about the same size that I needed for my shapes, but I did not cut out the shapes. Then, I ironed on the heatNbond to the wrong side of my fabric. Then I cut out the shapes (you see, this way I don't have to cut out the shapes twice.) Then I ironed the shapes onto my white pillow fabric. Then comes the hard part. I set my machine to a tight zigzag. Then I zigzagged around the outside of the shapes. It was somewhat difficult to make good corners and such. If I were to do this again, I would use a different type of stitch. Then I finished up my pillow. During the process, I would probably have said I would never do it again. But it is so cute finished, that I think I will. I will just learn how to do it better!!! -Anisa

Deadlines...yeah, this is our third and final deadline for this post. :) It is nice to get something like this done.This applique wall hanging measures 11" x 13". I'm framing it and hanging it in my little girl's room. It was a lot of fun doing the embroidery by hand and using several different stitches and styles to complete it all. --Cami

I have been wanting to do some applique on T-shirts for my kiddos for sometime now. I found an uber-cute skirt at The Children's Place and decided I could make a cutie-pie shirt to go with it for my littlest princess. Would I do it again? Maybe. I thought the knit fabric of the tee was hard to work with. I'd definitely be willing to try it on something not quite so stretchy, though. I do love the overall look and am contemplating what else I might like to do for some added embellishment. Happy crafting!


-Ang


Saturday, January 31, 2009

Clocks x3

*****Our give-away is still open! See post below*****


In January it seems like we focus a lot on time . We wonder where the previous year went. We buy new calendars. We make goals on how we're going to spend our time: more time with family, more time crafting...


With this in mind, we thought it'd be fun to all make clocks for our one craft-three ways post this month. (For another clock idea, check out this post by Anisa!)

Here they are:


Left to right, largest to smallest are Cami, Anisa, Angie.

Anisa's is a painted wood circle and the lovely paper is velvet-embossed.


Angie's is a wooden frame painted, embellished with cardstock designs cut using the Cricut and patterned paper behind the clock hands.


As for mine, I have a funny story to tell.


Crafts don't always go the way we want them to. Everything was going well with my clock. I painted a wooden circle with the paint I'd just used on my walls. The hands I'd made looked good after I'd embossed them with Ultra-Thick Embossing Enamel. I'd cut perfect circles out of scrapbook paper and thought I'd attach them with Mod-Podge. Things went horribly wrong as the cardstock started to warp and it began getting smeared, very obviously, over my careful paint job (during which I ruined a pair of jeans and almost ruined a sweater. Lesson: wear paint clothes while using paint!). I quickly removed the cardstock (my patterned paper survived), cut another circle of the same size and used a different adhesive. Unfortunately, Mod-Podge soaks into paper quickly and it had enlarged my original circle which in turn left a tacky paper-fuzz ring on the wood and it could not be removed or covered up with the original circle.

At this point it was time to go to Anisa's house so that we could get the clocks photographed together, so I thought I'd figure it out later, edit my finished clock into the photo for today's post.
I had a lot of fix-it ideas, but favored the idea of placing beads all around the cardstock to cover up the mess Mod-Podged mess. There are no brown tube beads at my local craft store so I looked around some more. I got the idea to use embossing powder to cover up the mess. I bought it and started heat embossing around my cardstock circle.
The embossing wasn't great, but I noticed another problem that my heat gun was causing. The acrylic wall paint was beginning to bubble and the Mod-Podge was turning an aged and dirty yellow color.
Right now, my clock is gross. My good-looking clock hands curled after I left the clock out in the cold garage for a few hours and the paint on the wood is beyond help. I am literally going to have to start all over and I will, right after I go buy sand paper... :(

Wednesday, December 17, 2008

Towels in Triplicate

For our 'One Craft, Three Ways' feature, Anisa came up with the fun idea of decorating our own Christmas dishtowels.

I think I was the most hesitant to do this project. What in the world was I going to do with a towel? For Christmas??? But not having any fabulous (or otherwise) ideas of my own to contribute, I went along with it. I managed to fly solo to Hobby Lobby where I bought some Christmas-y fabric, not totally loving it or knowing what to do with it. Then....I'm not sure what happened...but all of a sudden I knew what to do!

Remember back in the day when all dishes were done by hand? I remember my favorite dish towels, though slightly gray from years of dish-drying and counter-wiping were my moms flour sack towels that someone (probably her) embroidered. They were the best. No towel could dry a dish faster or better! Anytime I have to hand dry the dishwasher overflow, I've found myself wishing for those wondrous towels. And now....TA DA! Here they are!!


These amazing and adorable designs come from Wee Wondefuls. You can get the patter free here.


Of course I had to do both the boy and girl elf. They are way to cute to do just one!
-Ang


I love buttons. I think it comes from my love of scrapbooking and having texture and dimension on my pages. I'm not exactly sure where I came up with the idea (my own brain, I guess). I decided to sew buttons in the shape of a tree on my dish towels. Here they are. It's a little impractical to dry your hands on (you have to dry them on the side) but it's way cute!!!

-Anisa


I had a lot of great ideas floating around in my head for this one, but being severely limited by my lack of sewing maching I had to try other things.

After several failed attempts at as many ideas, I settled into something familiar...crocheted snowflakes. My tree is covered with them. I made them the during the second year of my marriage and they're still going strong. Anyway, it really stands out on the black towel that matches my kitchen.

--C

Friday, November 21, 2008

Gratitude Box

One of our favorite parts about crafts is diversity. We each have our own styles. One of the features we want to provide to you on our site is "One Craft- Three Ways." Once a month we will choose a craft that we all like and want to do. Then we will go our separate ways and create. We will publish the final results here for you to see how a blank canvas can turn out three different ways.
This month we chose Gratitude Boxes. This a great way for our families to share what we are grateful for. We can add our thoughts to these boxes year after year.

We started with a blank box. In this case, a papier mache from Provo Craft, purchased from the local craft store. (box measures 5 1/2" X 5 1/2" not including scallops)

Here is Anisa's final result. I decided that I would like to put a chipboard album inside mine to record my families thoughts on what they are thankful for. Here is a glimpse of what the inside of the album looks like. Each person has a page with a tab on the side with their name on it. Each page has a little paper bag pocket with a card inside. On each card, we will write the year and what we are grateful for.

I wanted a box that my family could contribute to on a monthly basis, so I tried to stay with everyday colors (versus fall colors). The plan is once a month we'll gather as a family and write down things we are thankful for. Come next thanksgiving we will have a great record of our last year's blessings and something fun to read over dinner. As my kids are all small, it will also be fun to see how their handwriting changes and improves.
Angie also wanted to use hers throughout the year and so chose colors that fit her home decor rather than traditional fall colors.
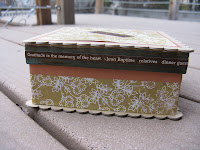
Cami went with a simple approach, using semi-traditional Thanksgiving colors.
She used 7 Gypsies Graditude sticker sheet to embellish the box as well as the cardstock squares inside.


Although Thankgiving is past, you can use this concept for anything. Last year, Anisa used an embellished craft lunch pail to make a box to hold the gifts that her family would give to the Savior for Christmas, such as service to others, etc. May be she'll share it before the month is out.